Copy the Google Sheet template
Required · ~2 minThis Sheet is your card database — it's where every Character, Weapon, Armoury item, Special Order, and Keyword definition lives. The app reads it every time it loads. Making your own copy means you fully own and control it: you can add cards, fix typos, or update stats at any time, and the app picks up the changes immediately on the next refresh.
The template is a free download from the itch.io page. It took a fair amount of work to put together, so if you find it useful, a donation there is genuinely appreciated — but it's entirely optional and nothing is held back if you don't.
- Download the template using the link below.
- Go to File → Make a copy, and save it to your own Google Drive.
- Rename it whatever you like — the name doesn't matter to the app.
Understanding the Sheet
ReferenceYou don't need to fill out the whole Sheet before the app works — the example rows are enough to test the connection in Step 3. But you'll need to understand the structure before you start adding real cards. This section explains how every part of it works.
The List tab: one row = one card
Each row in the List tab represents one card in the game. The Type column tells the app what kind of card it is — Character, Armoury, Special Orders, Command Upgrades, Fireteam Upgrades, or Rules. Every other column is the data that shows up on that card in the app.
Columns explained:
- Item Name — the card's display name. This is what appears in the browse list and on the card itself. See the "Links in Item Name" section below for how to attach an image.
- Faction — which faction(s) can use this card. Use comma-separated values for items available to multiple factions (e.g.
UNSC, Banished). The app uses this for competitive faction validation. - Detachment — the detachment within a faction (e.g.
ODST,Jiralhanae). Leave blank for cards with no detachment restriction. - Type — see above. Must be one of the exact values the app recognises:
Character,Armoury,Special Orders,Command Upgrades,Fireteam Upgrades,Rules. - Points — the card's point cost. Numbers only, no units.
- Keywords — a comma-separated list of keyword names, exactly as they appear in the Keywords tab (e.g.
Energy Shield (2), Tactician (1)). The app matches these against the Keywords tab to show hover definitions. Extra text in parentheses like(2)is fine — the match is flexible. - RA / FI / SV / Speed / Armour / HP — the six stat columns for Character rows. Leave these blank (or with a dash) for non-Character rows like Armoury items.
- Weapon 1–3 columns — each weapon has a Type (
Ranged,Close Combat, orGrenade), Name, Range, AP, and Keywords sub-column. For a character's built-in weapons, fill these in. For Armoury weapon rows, the app reads the weapon data from the same columns. See "Links in Weapon Names" below for attaching weapon images. - Description — free text shown on the card and in the info panel. For Armoury items and Special Orders, this is the rules text. For Rules rows, this is the full rule text itself. Supports plain text; line breaks are fine.
- Restrictions — controls when an item can be added to a roster. Leave blank if there are no restrictions. See the Restrictions Guide tab in your Sheet for the full token reference.
Adding image links — Item Name and Weapon Name cells
The app can display card art and weapon images by reading a link embedded directly in the cell — not from a separate column. Here's how it works:
- Upload your card images to Google Drive (any folder is fine).
- Right-click the image in Drive → Get link → change sharing to "Anyone with the link" → copy the link.
- In your Sheet, click on the Item Name cell (or the Weapon Name cell) for that card.
- Press Ctrl+K (or Cmd+K on Mac) to open the Insert Link dialog.
- Paste the Google Drive link and click Apply. The cell text stays the same — it just now has a link underneath it that the app can read.
The app checks whether a cell has a link attached to it. If it does, it uses that link as the image source. If it doesn't, it shows the default card placeholder. This means you can have a name like MA40 Assault Rifle display as text in the Sheet, but open as a card image inside the app.
The Keywords tab
The Keywords tab has two columns: Keyword (the name, exactly as it'll be referenced in the List tab's Keywords column) and Definition (the rules text that appears on hover inside the app).
- A keyword in the List tab matches an entry here if the keyword name contains the entry's name — so
Energy Shield (2)in a card's keywords will match theEnergy Shieldrow in this tab. - If a keyword in a card's row has no matching entry here, the hover tooltip just won't appear for that keyword. Nothing breaks.
- Keep definitions up to date with any official errata — this is the single source of truth the app uses for keyword text, so if Mantic changes a keyword's rules, just edit the definition here and every card that uses it updates automatically.
- There's no limit on definition length, but shorter is more readable in the hover tooltip.
The Translations tab
The Translations tab controls every piece of text in the app's UI — button labels, error messages, modal titles, PDF export strings, everything. It ships with English and French columns already filled in. You don't need to touch this tab unless you want to:
- Add a new language: create a new column to the right of French. The column header becomes the language name shown in Settings. Fill in every row in that column with your translated text. The app will automatically make this language available as a choice in the Settings → Language selector — no code change required.
- Customise existing text: just edit the English or French cell directly. For example, if you want to change "Add to Roster" to "Add to List" in your own copy, edit that cell and the app picks it up on the next refresh.
The Key column (first column, locked) is what the app uses internally to find each string. Don't edit the Key column. The English and French values are what actually appear in the UI.
The Restrictions column — quick reference
The Restrictions column controls when an item can be added to a roster, and for Special Orders, which competitive detachment context they appear in. Leave it blank if there are no restrictions. Multiple tokens are separated by | — all conditions must be true.
Character & roster conditions — who must be in the roster for this item to be available:
REQUIRES_CHAR_NAME_INCLUDES:value— roster must include a character whose name contains this text (e.g.REQUIRES_CHAR_NAME_INCLUDES:master chief)REQUIRES_CHAR_FACTION_INCLUDES:value— roster must include a character of this factionREQUIRES_CHAR_DETACHMENT_INCLUDES:value— roster must include a character in this detachmentALL_CHARS_DETACHMENT:value— every character in the roster must be this detachmentALL_CHARS_FACTION:value— every character must be this faction
Special Orders — competitive detachment visibility — use these instead of the Detachment column for Special Orders. The Detachment column on Special Order rows must stay blank (writing anything there pollutes the browse filter dropdown):
ALL_UNITS_ONLY— this Special Order only appears in comp when "All Units" is selected; hidden for specific detachments like ODST or JiralhanaeDETACHMENT_ONLY:value— this Special Order only appears in comp for this specific detachment (e.g.DETACHMENT_ONLY:ODST). Use multiple pipe-separated entries to allow more than one detachment:DETACHMENT_ONLY:ODST|DETACHMENT_ONLY:Jiralhanae
Weapon-slot rules:
REQUIRES_WEAPON:value— character must already have this weapon on their base card (used for replacement weapons like combat knives)BLOCKS_LEGEND— item cannot be equipped by Legend-tier charactersEXEMPT_FROM_WEAPON_LIMIT— item doesn't count against the weapon-per-character cap
The full reference with worked examples is in the Restrictions Guide tab of your Sheet.
Deploy the Apps Script
Required · ~5 minApps Script is a small free Google service that connects your Sheet to the app. Think of it as a messenger: the app asks it "give me the card data from this Sheet," it reads the Sheet and sends the data back. The connector script (Code.gs) is already included inside your copied Google Sheet — you don't need to download or paste anything for that part.
- In your copied Sheet, go to Extensions → Apps Script. A new tab will open with a code editor. The script is already there — don't delete or edit it.
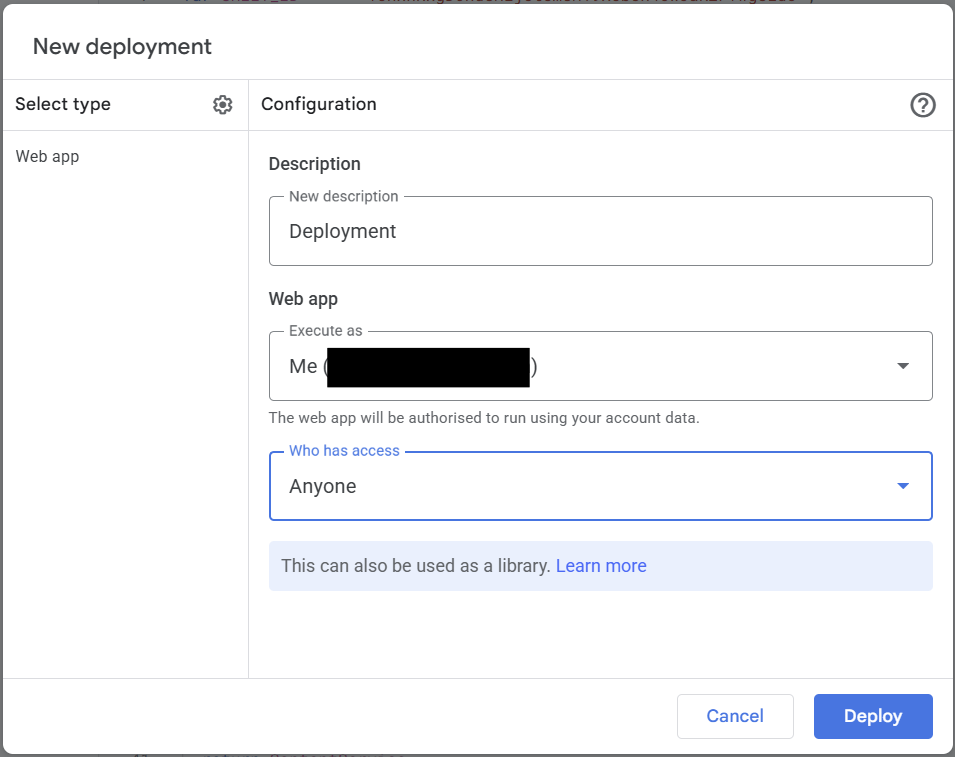
- Click Deploy → New deployment.
- Next to "Select type," click the gear icon and choose Web app.
- Set Execute as to Me, and Who has access to Anyone.
- Click Deploy. Google will ask you to authorise the script — click through the prompts and allow it.
- Copy the Web app URL shown on the final screen. It ends in
/exec. Save this somewhere — you'll paste it into the app in Step 5.
appsscript.json manifest into your Apps Script project before deploying sets the correct OAuth scopes in advance, which makes the authorisation step smoother and avoids unexpected permission prompts. To use it: in the Apps Script editor, go to Project Settings → Show "appsscript.json" manifest file in editor, then replace the file's contents by pasting the text below. Click the button to copy it to your clipboard.
Paste this into the appsscript.json file in your Apps Script editor, replacing all existing content.
First-Run Wizard
Required · ~2 minThere's nothing to download or host — the app is already online and ready to use. Open it, point it at your own Sheet, and you're done.
- Open the app using the link within itch download. On first visit it shows a short setup screen.
- Paste the Web app URL you saved at the end of Step 2 — the one ending in
/exec. - Click Test Connection. You should see a green confirmation showing how many rows of card data it found in your Sheet.
- (Optional) Add your Supabase details if you want cloud roster saves — see Step 4. You can skip this entirely and add it later.
- Click Save & Continue to enter the app.
Your connection details are remembered on your device, so you'll go straight into the app next time rather than seeing the setup screen again.
Connect Supabase for cloud saves
Optional · ~5 minThis step adds cloud roster saves — the ability to save a roster in the app and load it again on any device (your phone, your partner's tablet, a different computer). If you skip it, you can still save and share rosters as JSON files, which works with zero setup and never expires.
- Create a free account at supabase.com.
- Click New project. Give it a name, set a database password (store it somewhere — you won't need it often, but Supabase requires it), and choose the region closest to you.
- Wait for the project to finish initialising (usually 1–2 minutes).
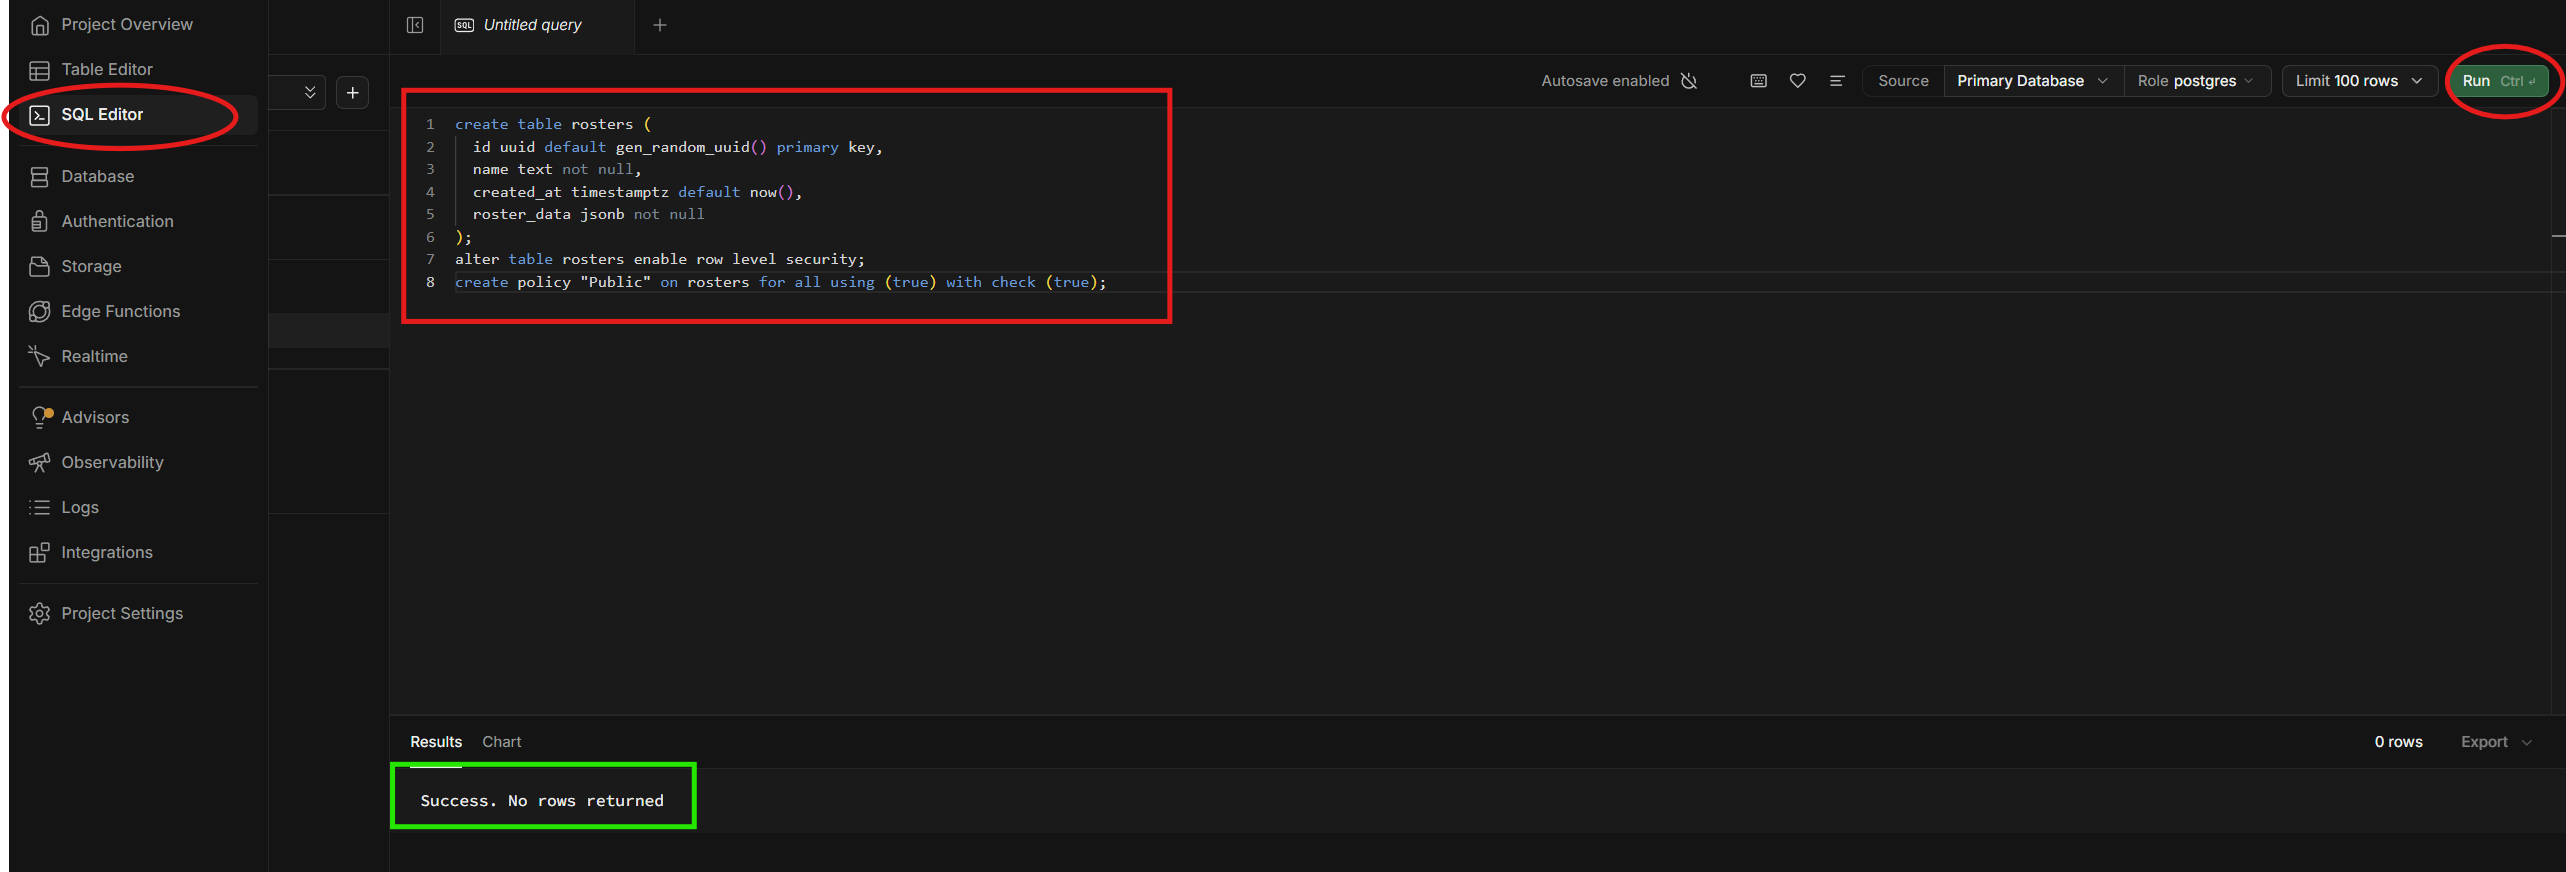
- Go to the SQL Editor tab in your project dashboard.
- Copy the
supabase-setup.sqlscript using the button below and paste it into the SQL Editor. Click Run. This creates the single table the app needs to save rosters.
Paste this into the Supabase SQL Editor and click Run.
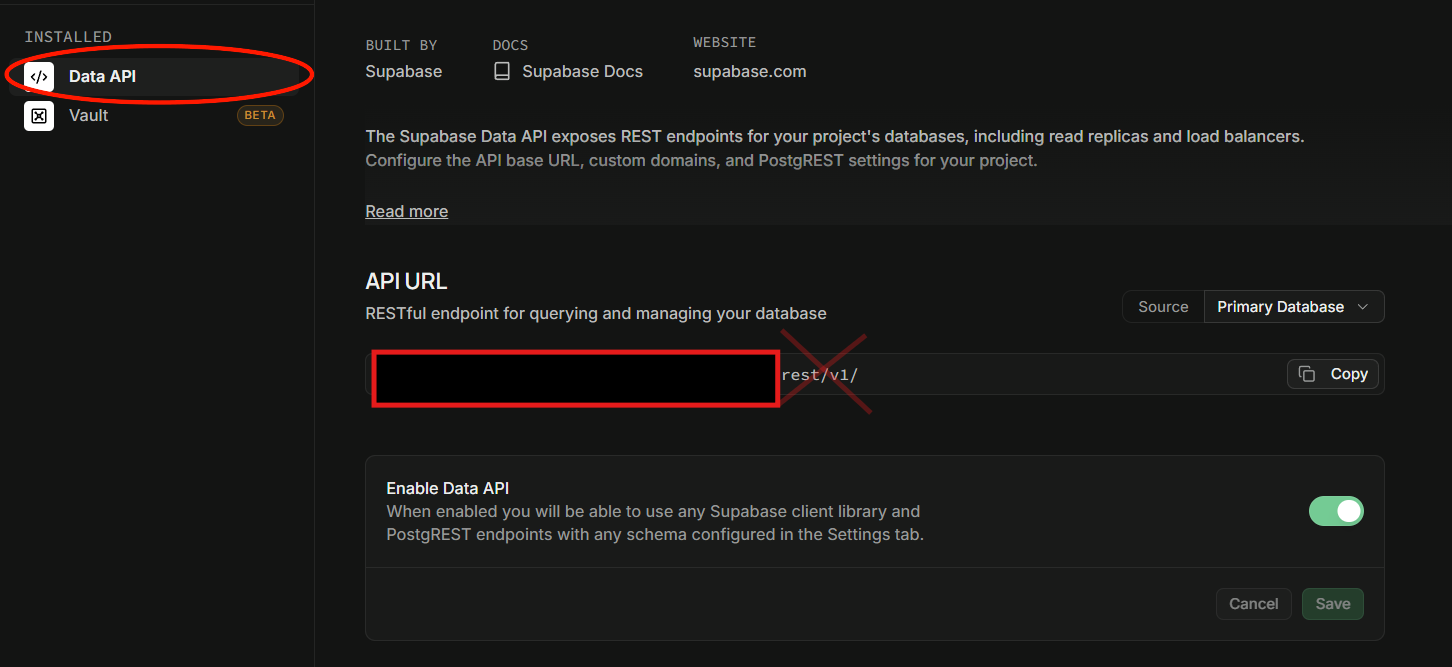
- Go to Project Settings → Data API to find your Project URL. Copy only the base URL — it ends in
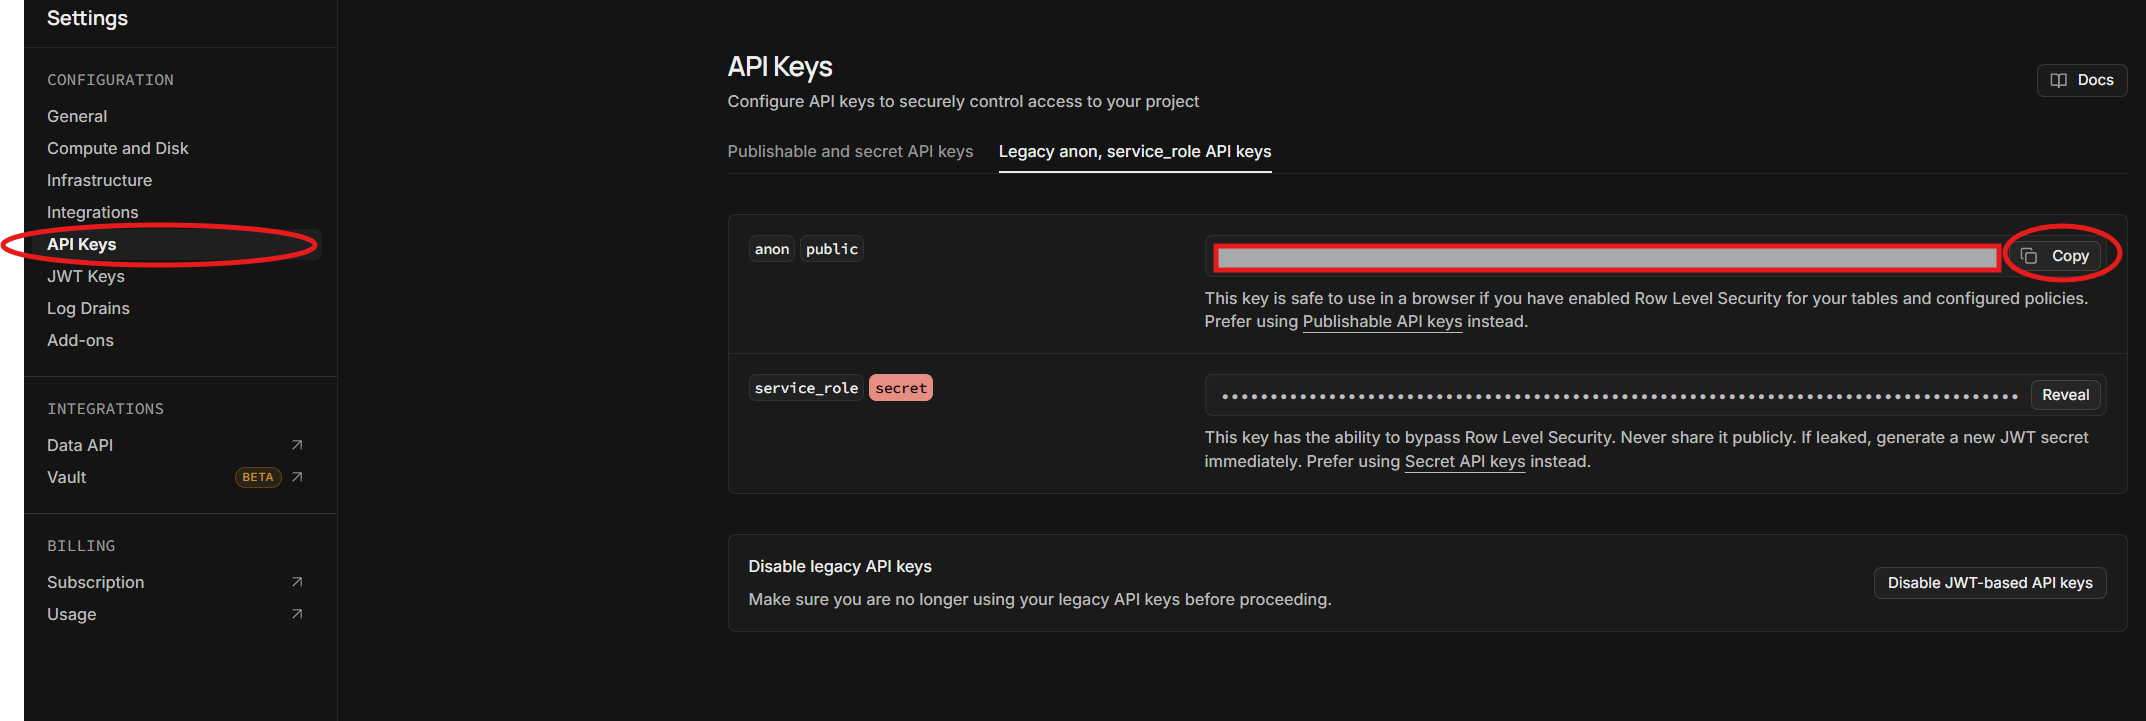
.supabase.co. Delete anything that comes after that (such as/rest/v1/) before pasting it into the app. - Go to Project Settings → API Keys to find your anon public key. Copy that key (not the service_role key).
- Back in the app, open Settings → Edit Connections, paste both values into the Supabase fields, and click Test Connection.
Run a Health Check
Recommended · ~1 minBefore building your first list, go to Settings → Sheet Health Check → Run Health Check. This scans your card data for the most common setup problems: missing required fields, duplicate card names, keywords referenced in cards that don't exist in the Keywords tab, and broken image links.
A clean result (zero errors) means your Sheet is correctly structured and the app will behave as expected. If there are warnings, the Health Check tells you exactly which row and column to look at.
Your data, and what I can see
Worth readingShort version: I can't see any of it. Here's exactly how it works, so you can judge that for yourself rather than taking my word for it.
- Your Sheet stays yours. It lives in your Google Drive, under your account. Your Apps Script deployment runs under your Google account too. I have no access to either.
- Your connection details never leave your device. The Apps Script URL and Supabase keys you enter are saved in your own browser's local storage so you don't have to retype them each visit. They are not sent to me, not stored on any server I run, and not logged anywhere.
- Card data goes straight from your Sheet to your browser. When the app loads your cards, that request goes from your device directly to your own Apps Script. It does not pass through me.
- Rosters are yours. Saved locally, or to your own Supabase project if you set one up. I have no visibility into either.
- No account, no login, no tracking. There's nothing to sign up for, so there's nothing for me to hold.
I host the app itself and nothing more. Think of it as a page that knows how to read your spreadsheet — the page is mine, everything it reads and writes is yours.
Install on your phone or tablet
Optional · ~1 minThe app can be installed on both iPhone/iPad and Android devices so it opens like a native app — full screen, no browser bar, with its own icon on your home screen.
iPhone & iPad (Safari only)
This only works in Safari. Chrome and Firefox on iOS cannot install web apps to the home screen.
- Open the app in Safari on your iPhone or iPad.
- Wait for the page to fully load — you should see the first-run setup screen or the Browse panel if already connected.
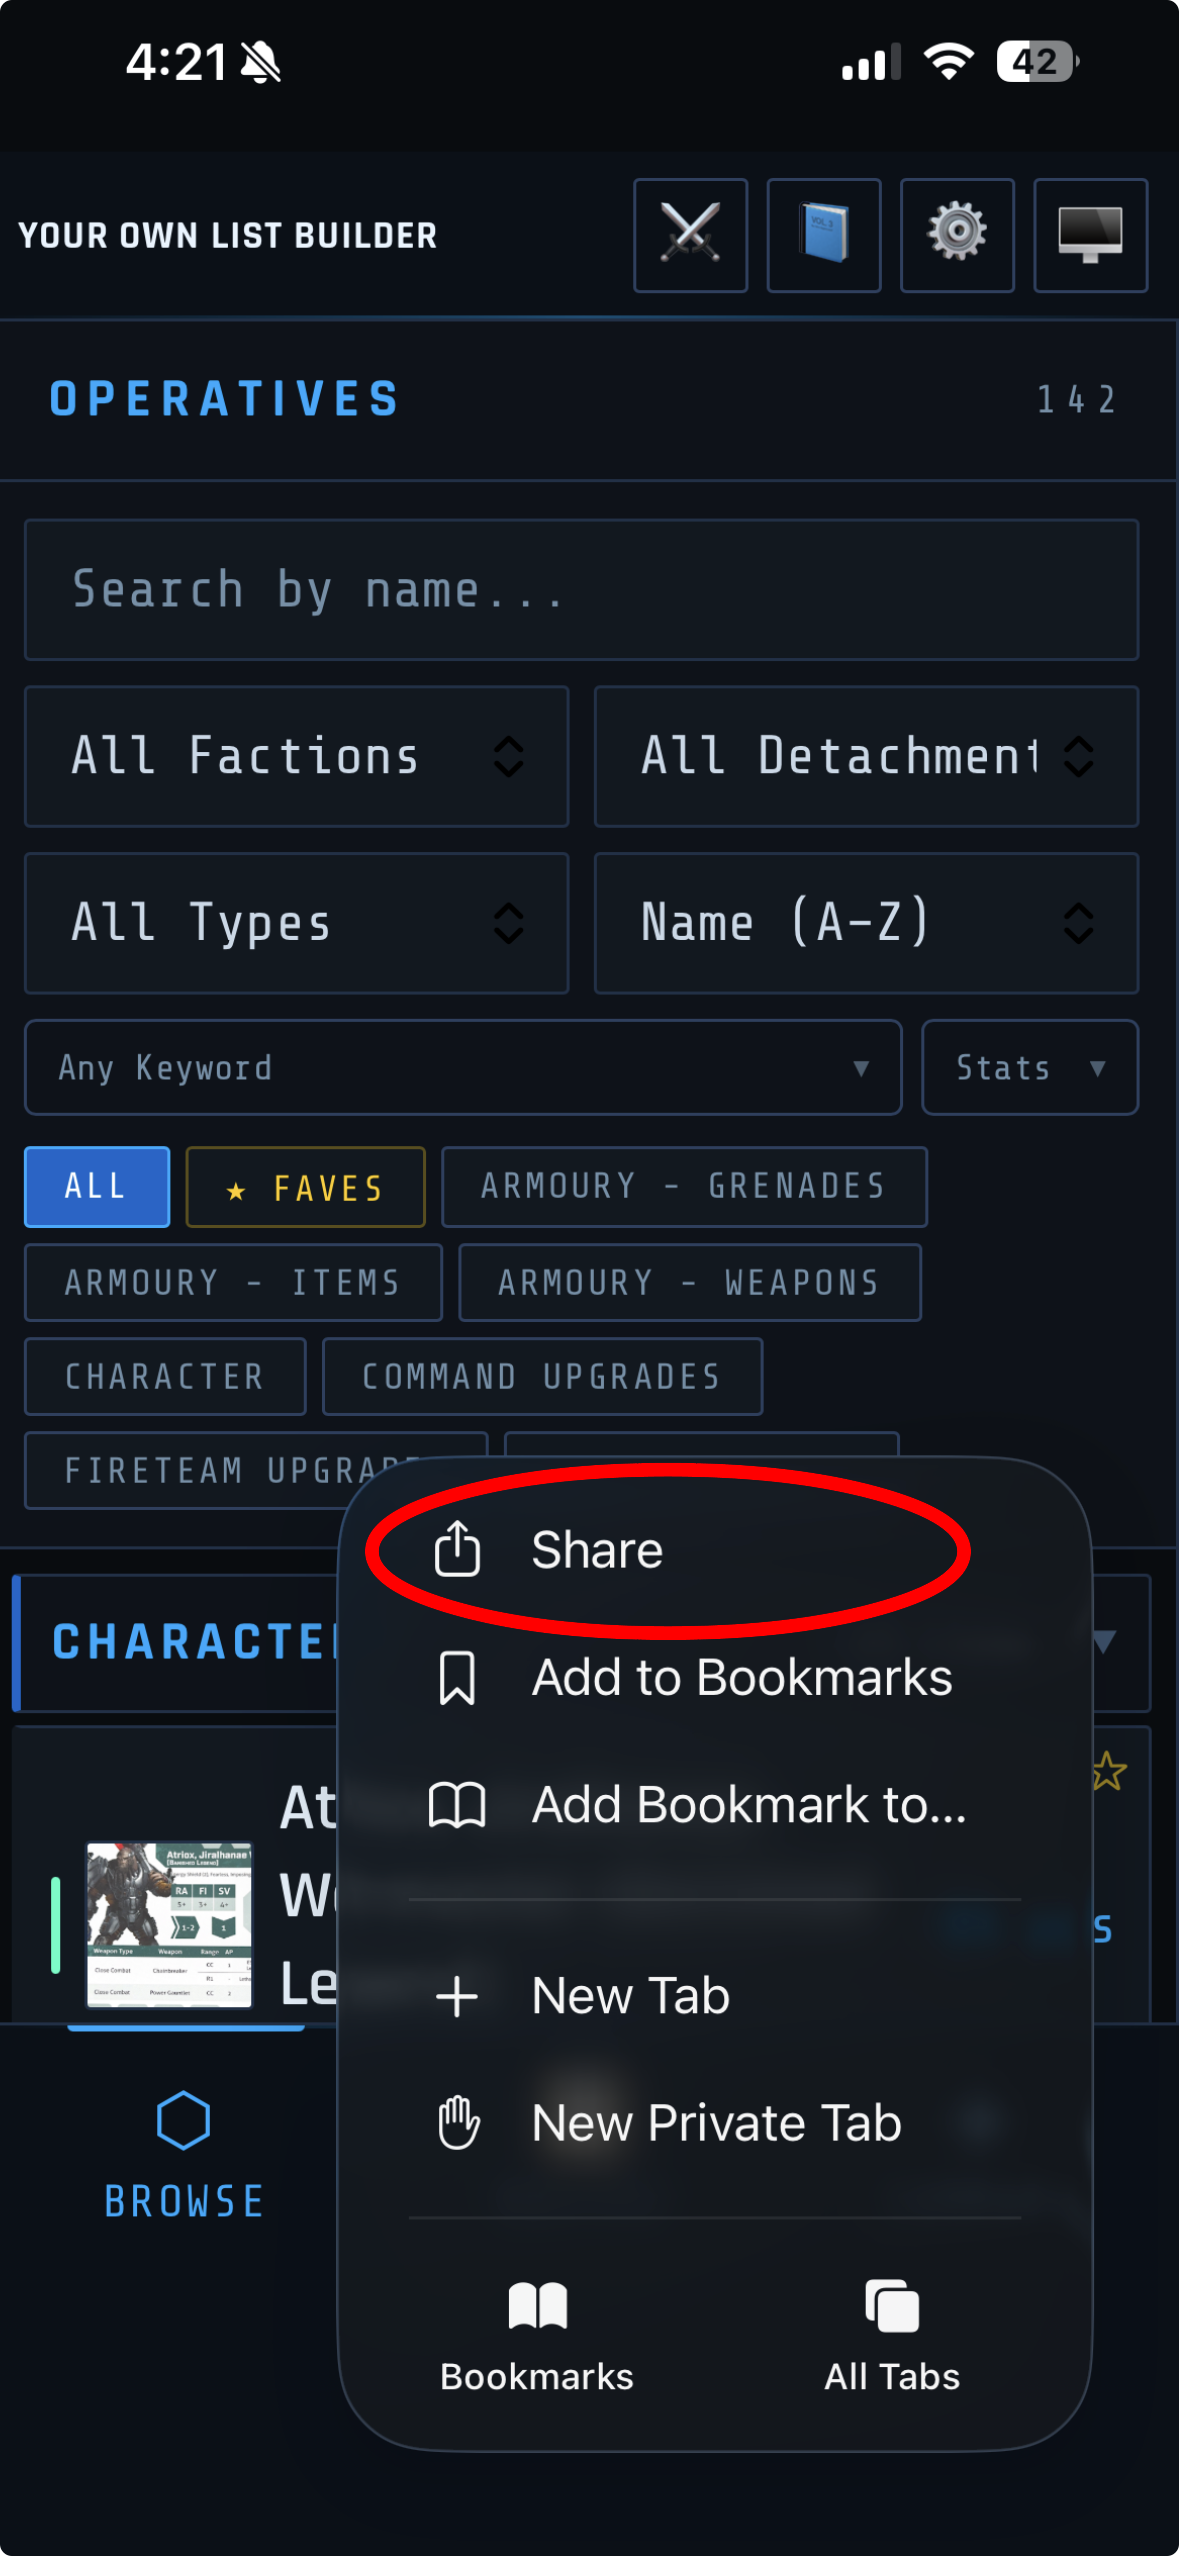
- Tap the Share button at the bottom of the screen (the box with an arrow pointing up).
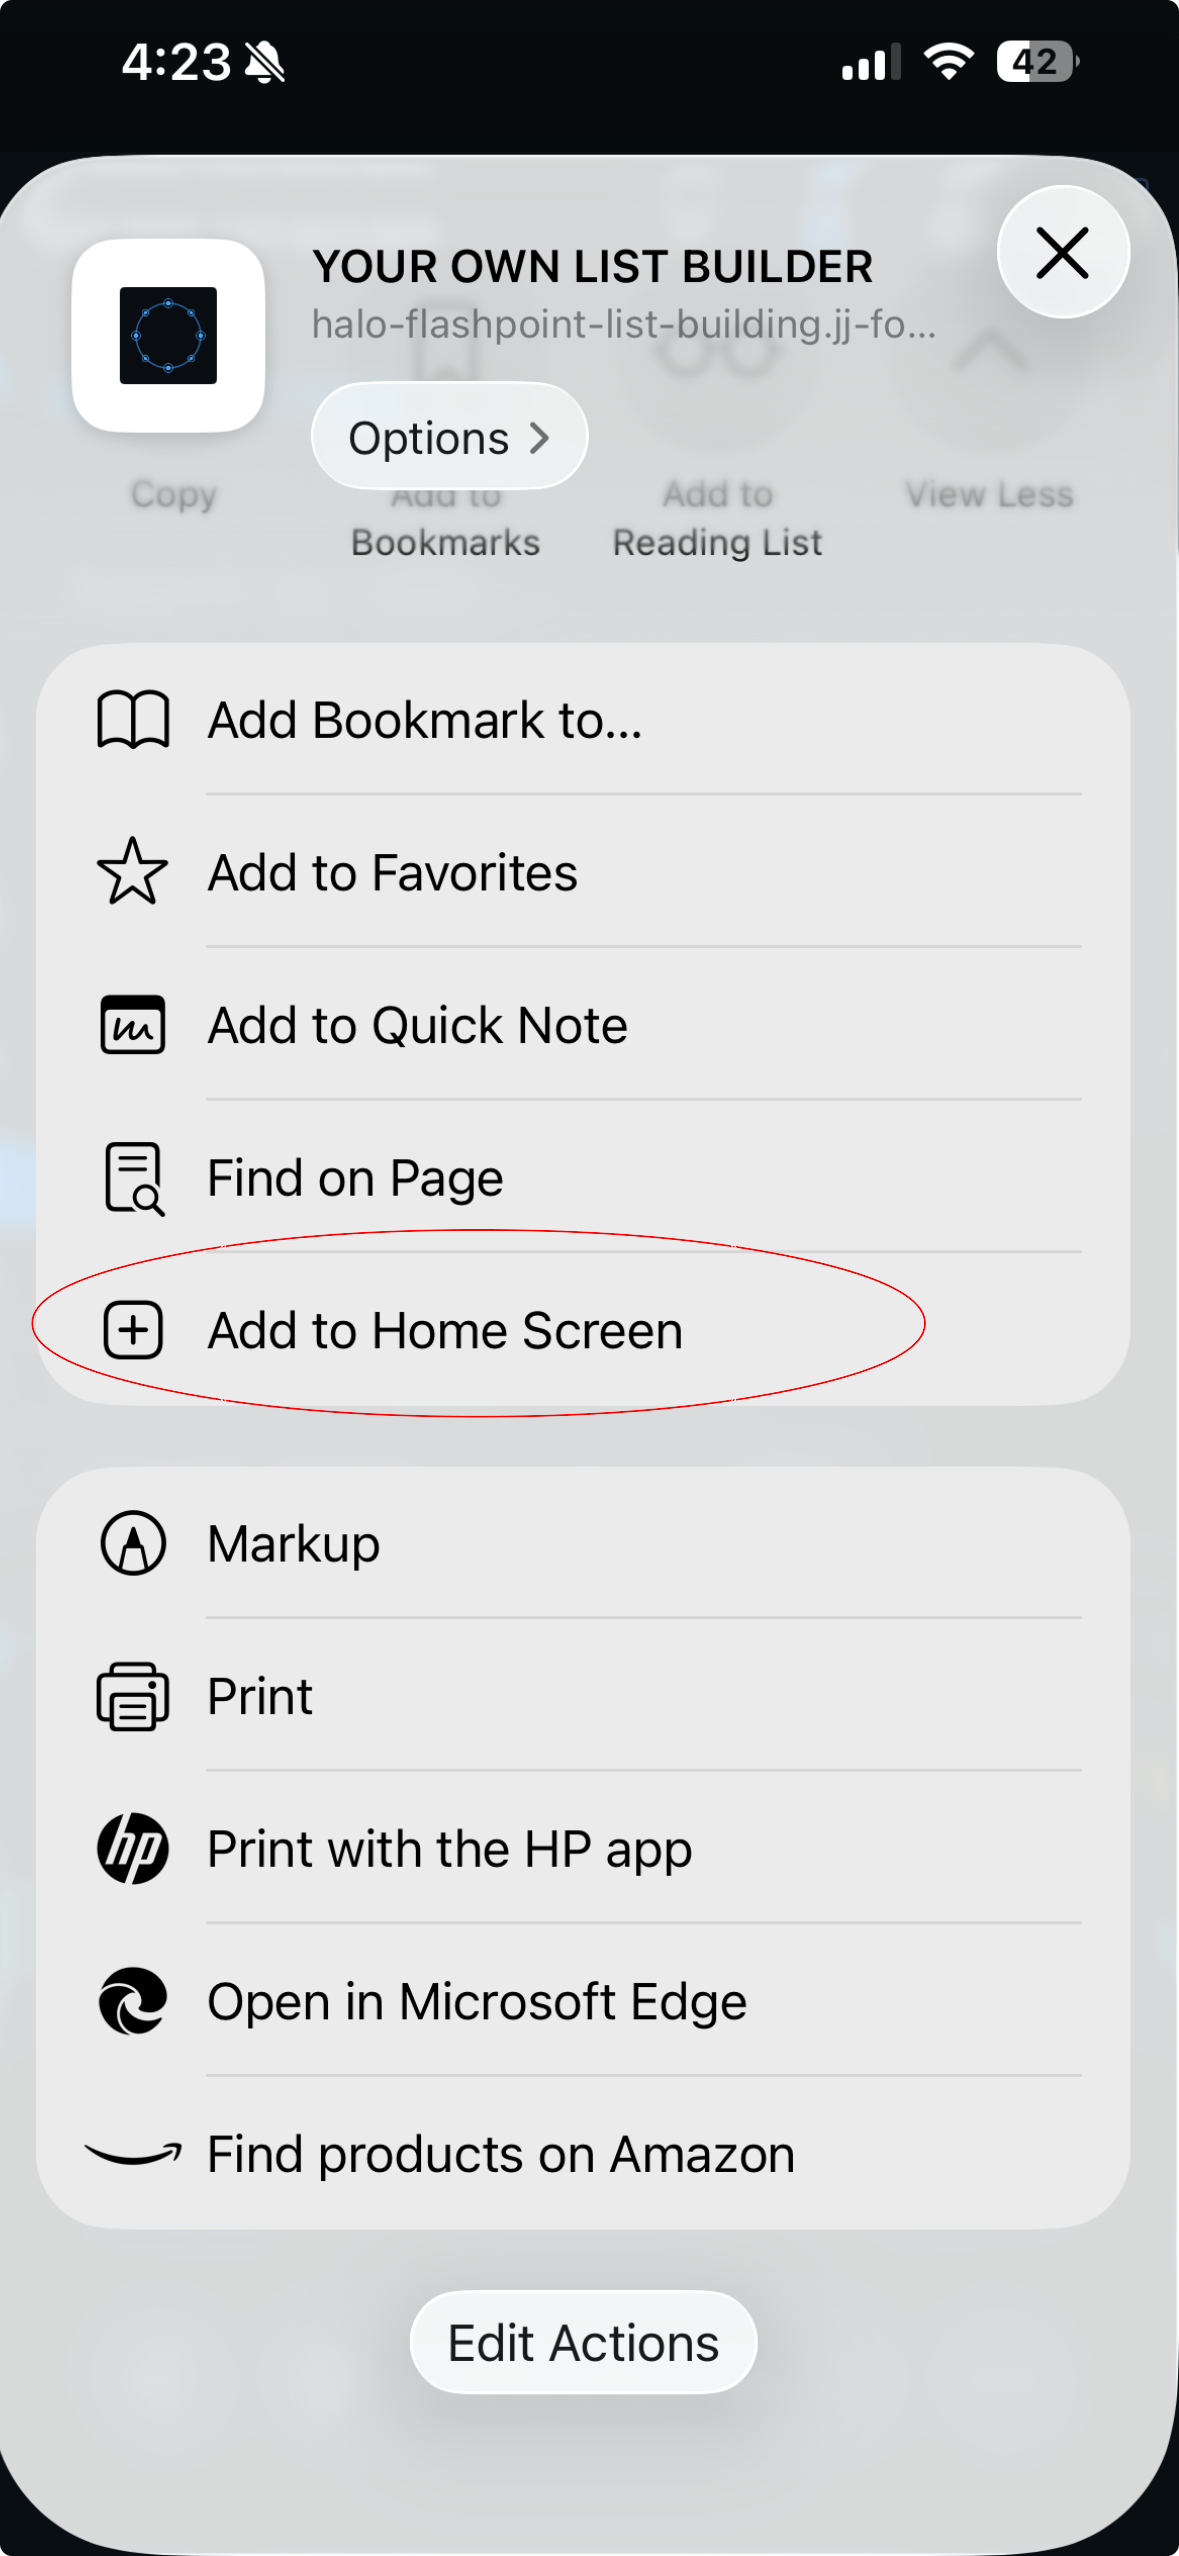
- Scroll down in the share sheet and tap Add to Home Screen.
- Give it a name (or keep the default) and tap Add in the top right.
- The app now appears on your home screen with its own icon and opens full-screen.
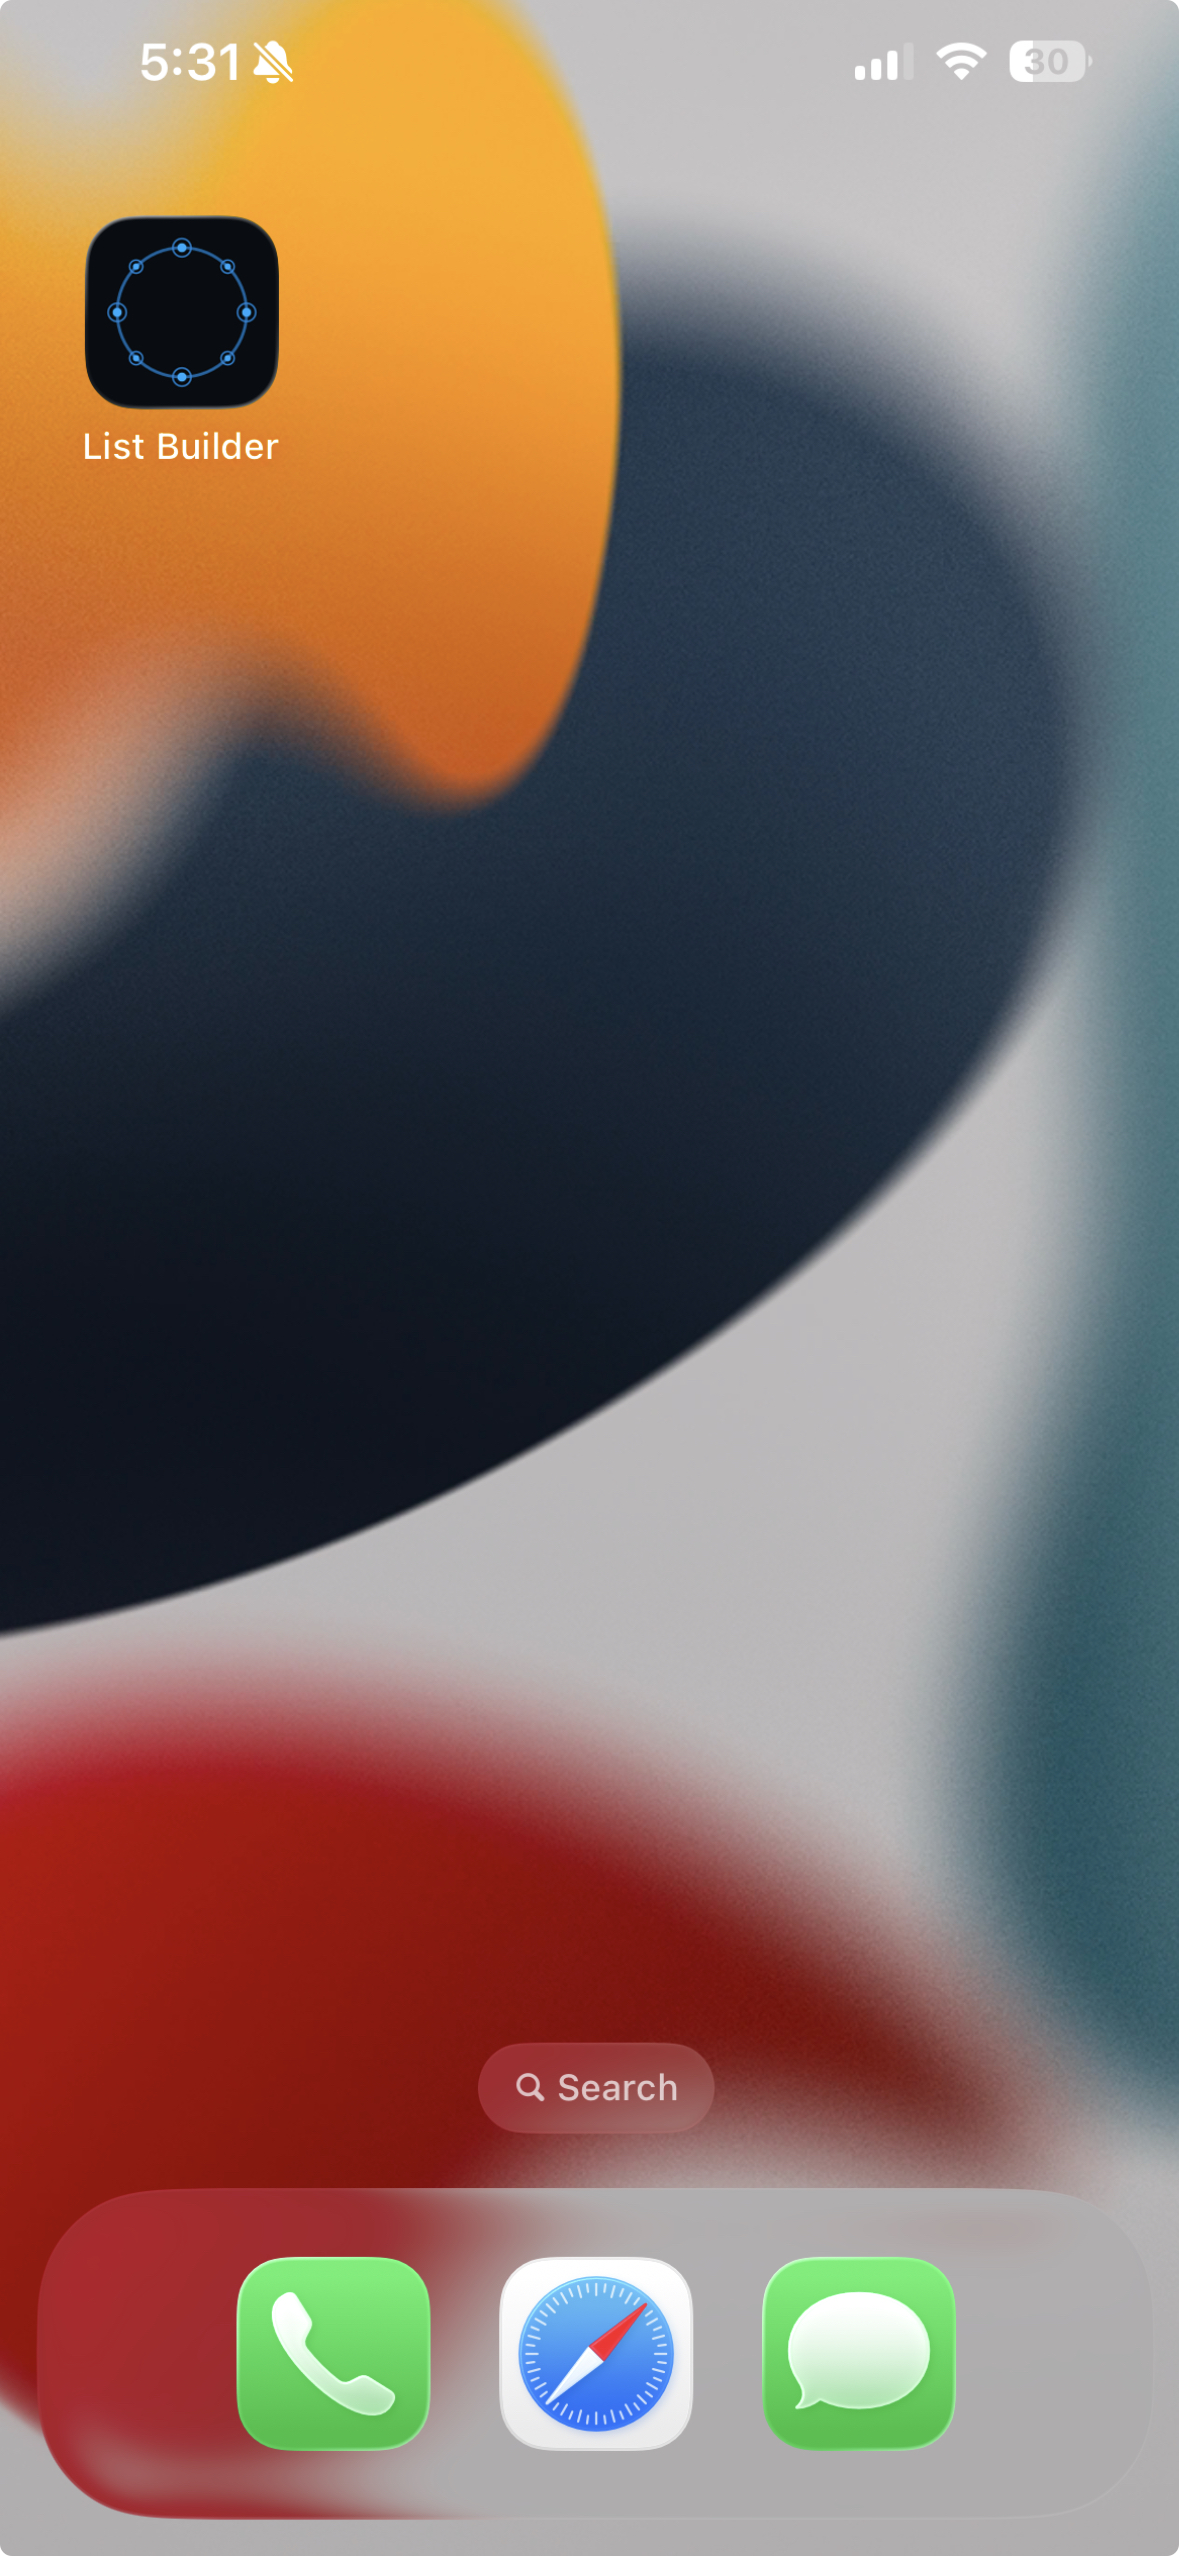
apple-touch-icon.png file in your GitHub repository is what gives the home screen icon its correct appearance on iOS — without it, iOS falls back to a generic screenshot thumbnail.
Android (Chrome)
On Android, installation works through Chrome and is even more straightforward — Chrome often prompts you automatically.
- Open the app in Chrome on your Android device.
- Wait for the page to fully load.
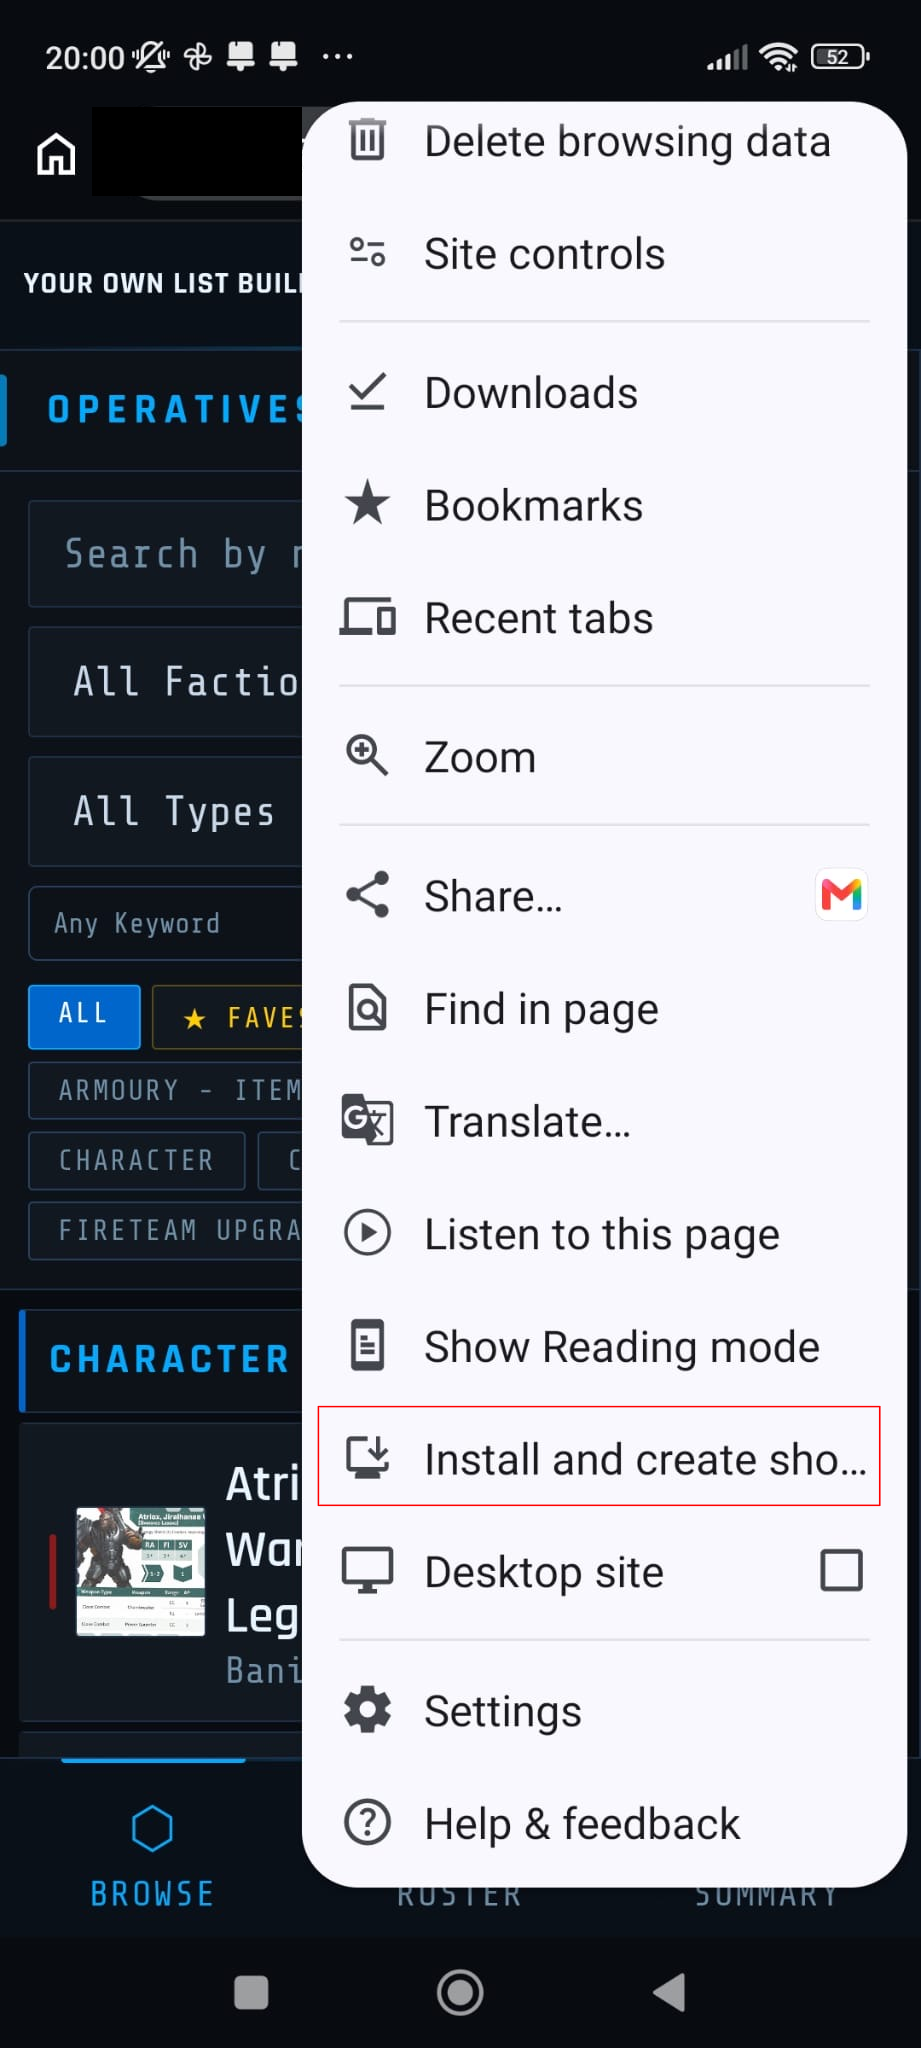
- Tap the three-dot menu in the top right corner.
- Tap Add to Home screen (or Install app if Chrome shows that option instead — both do the same thing).
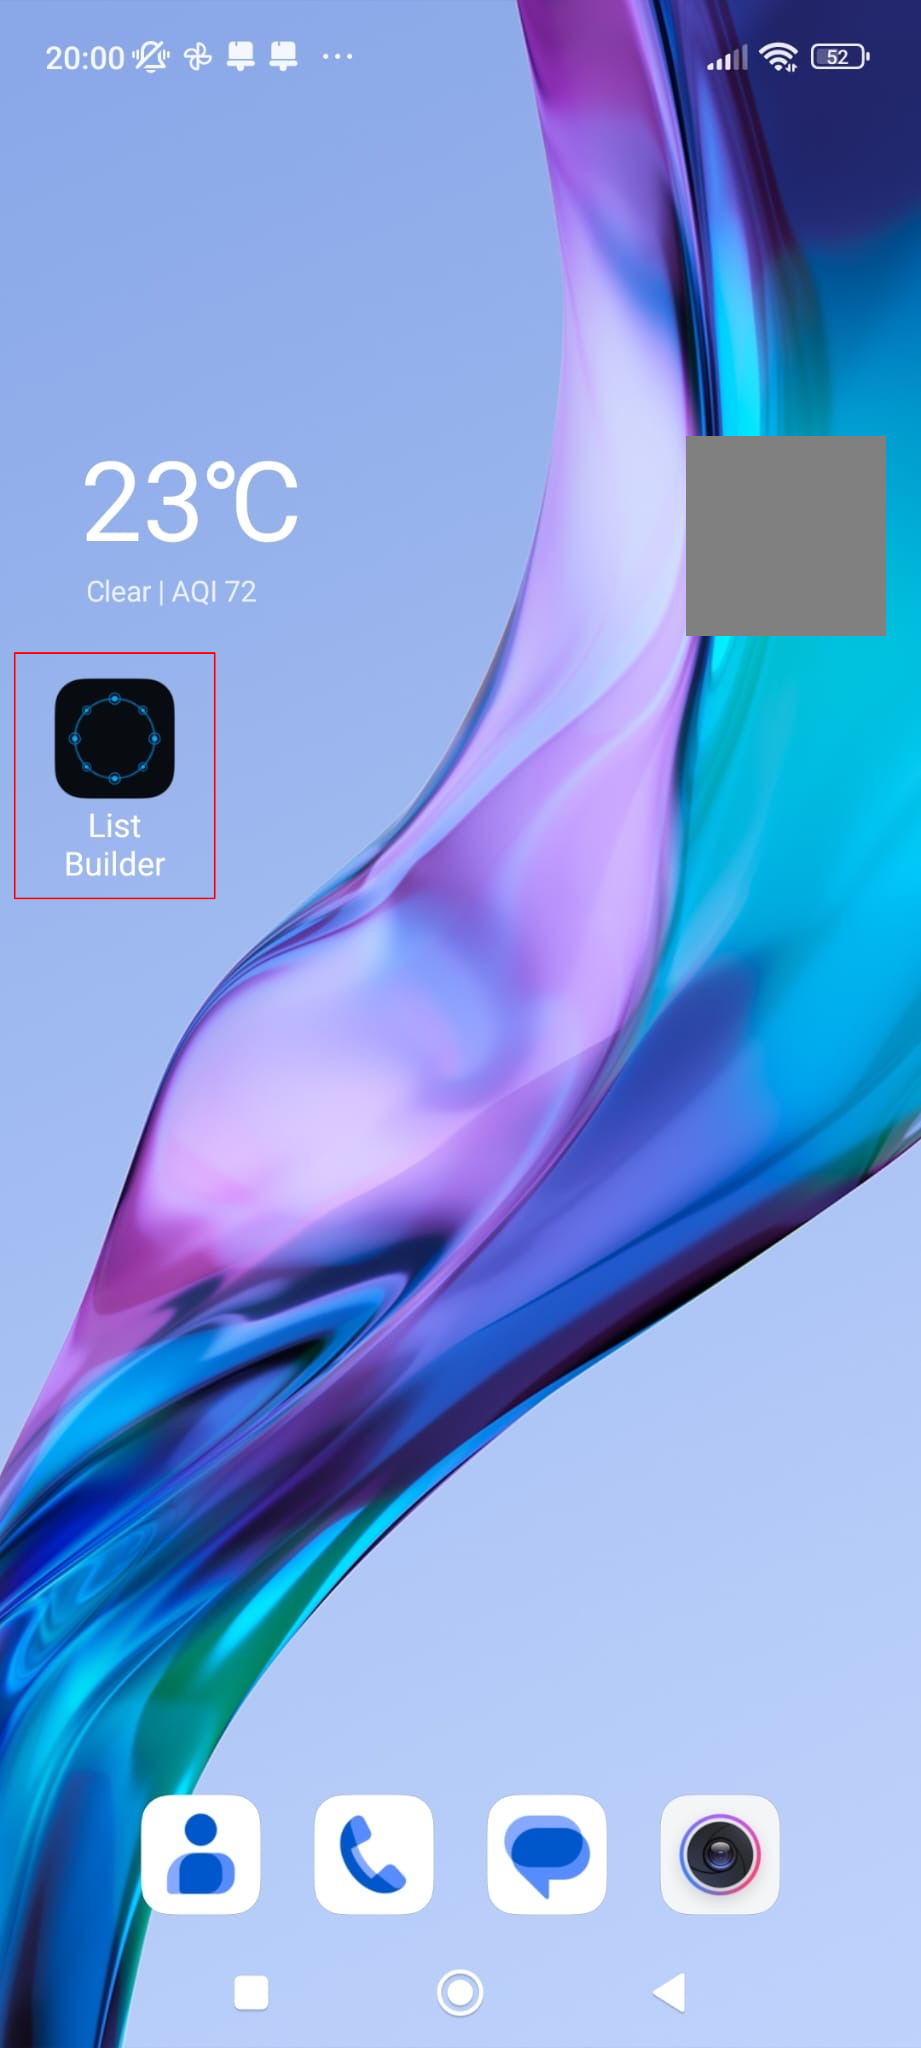
- Give it a name and tap Add. The app icon will appear on your home screen.
- Opening it from the home screen launches it full-screen without the browser bar.